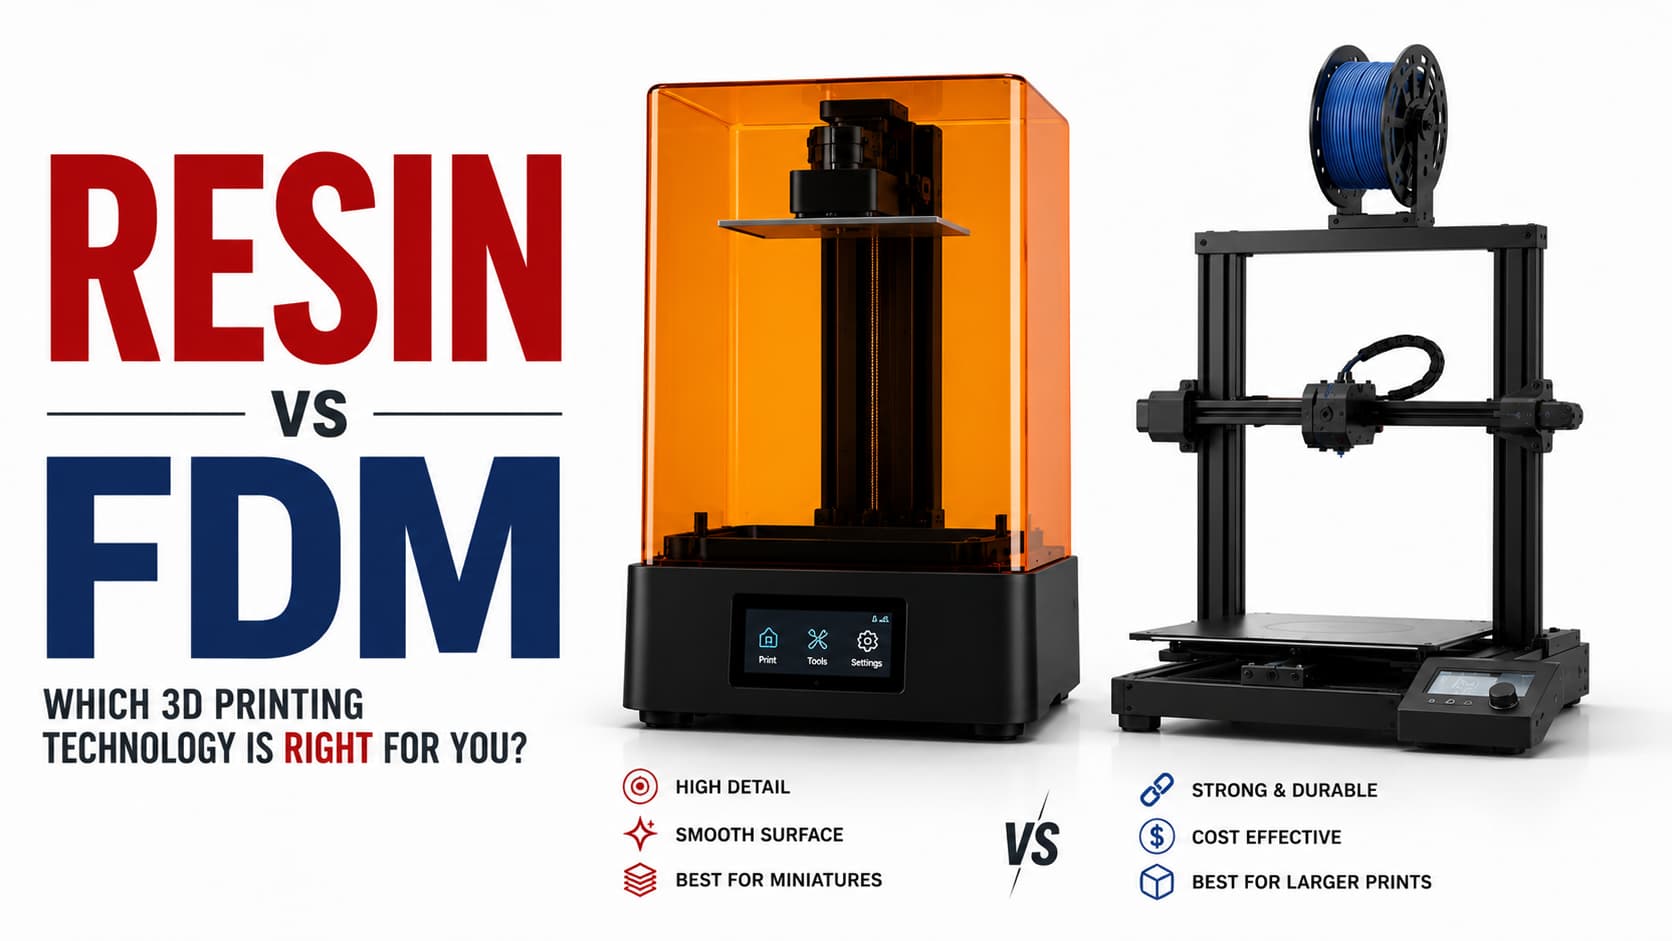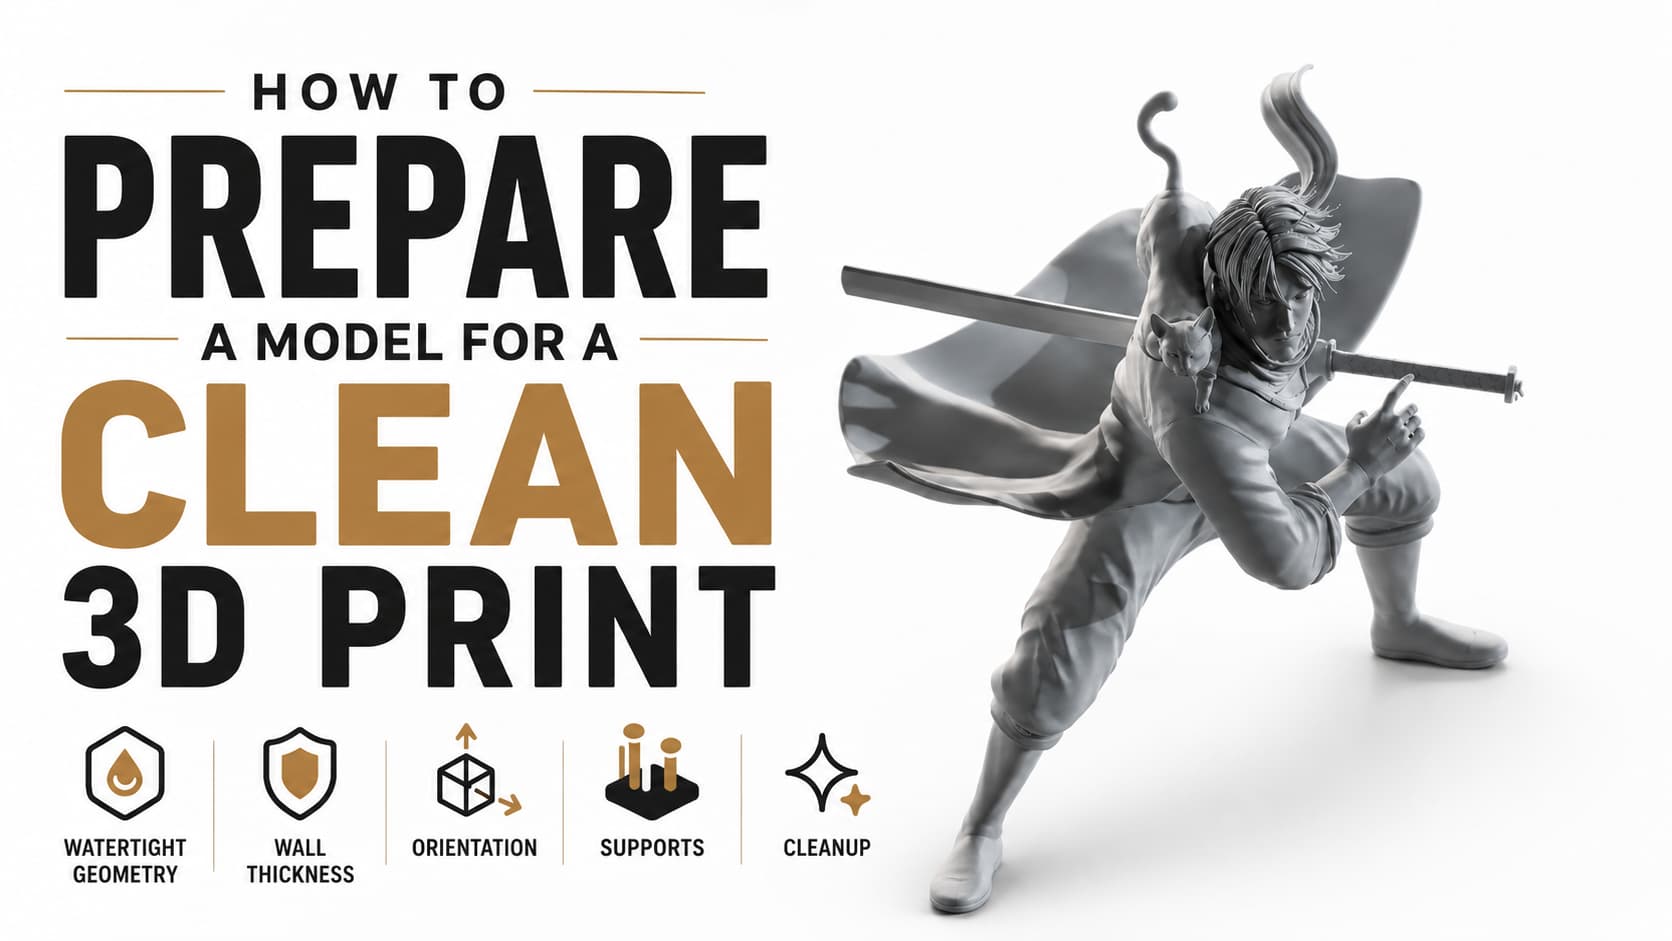
Not every 3D model is ready to print. A model that looks perfect in Blender or ZBrush can still fail once it reaches the printer. Preparing a model for resin printing means checking the geometry, reinforcing delicate areas, and making sure it can be printed reliably.
1. Make the model watertight
The model should be a single closed mesh with no holes, flipped normals, or overlapping geometry. A watertight model gives the slicer a clear solid volume to work with and prevents unexpected printing errors.
2. Check wall thickness
Thin parts such as fingers, hair strands, weapons, and accessories are the most common failure points. We adjust these areas so they’re strong enough to survive printing and handling while keeping the overall design intact.
3. Choose the right orientation
How a model is positioned on the build plate affects both print quality and support marks. Rotating the model correctly helps reduce visible imperfections and improves the chance of a successful print.
4. Place supports carefully
Supports are necessary for resin printing, but poor placement can damage fine details. We position supports on hidden or less noticeable areas whenever possible to minimize cleanup after printing.
Final thoughts
A successful print starts long before the printer is turned on. Proper model preparation reduces failed prints, saves material, and produces cleaner results. Every printable model we deliver is checked and prepared so it’s ready for production—not just for rendering.